PXE Zone providing Network Booting for Compute Nodes
The PXE zone is a SunOS Zone, which acts as a DHCP and TFTP server and is used for booting and installing compute nodes on the admin network.
Note
The network boot install script functionality is available from Danube Cloud version 2.6.
Creating a Zone with admin NIC
Create an PXE zone. The disk should be large enough for storing one or two compute node USB images (at least 10 GB).
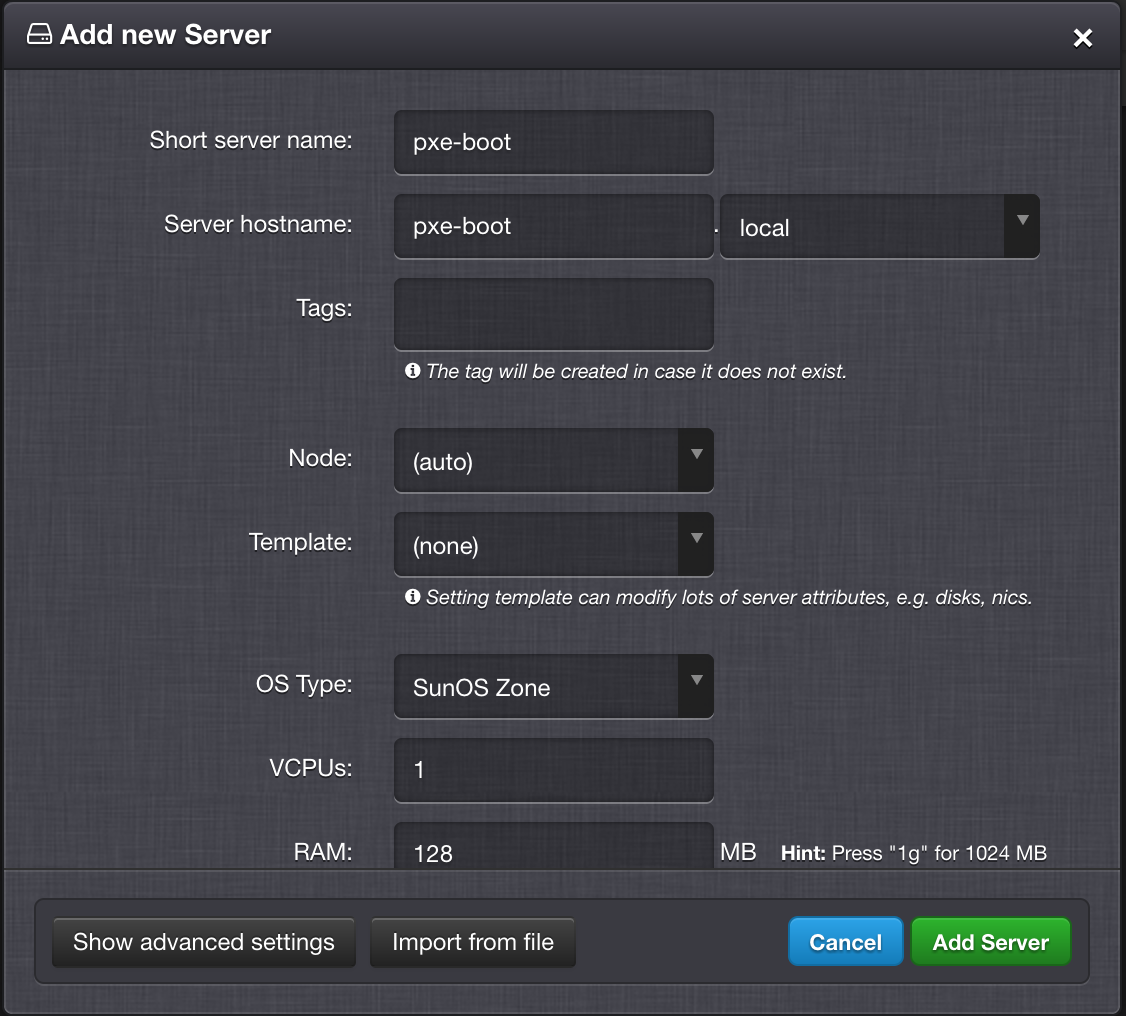
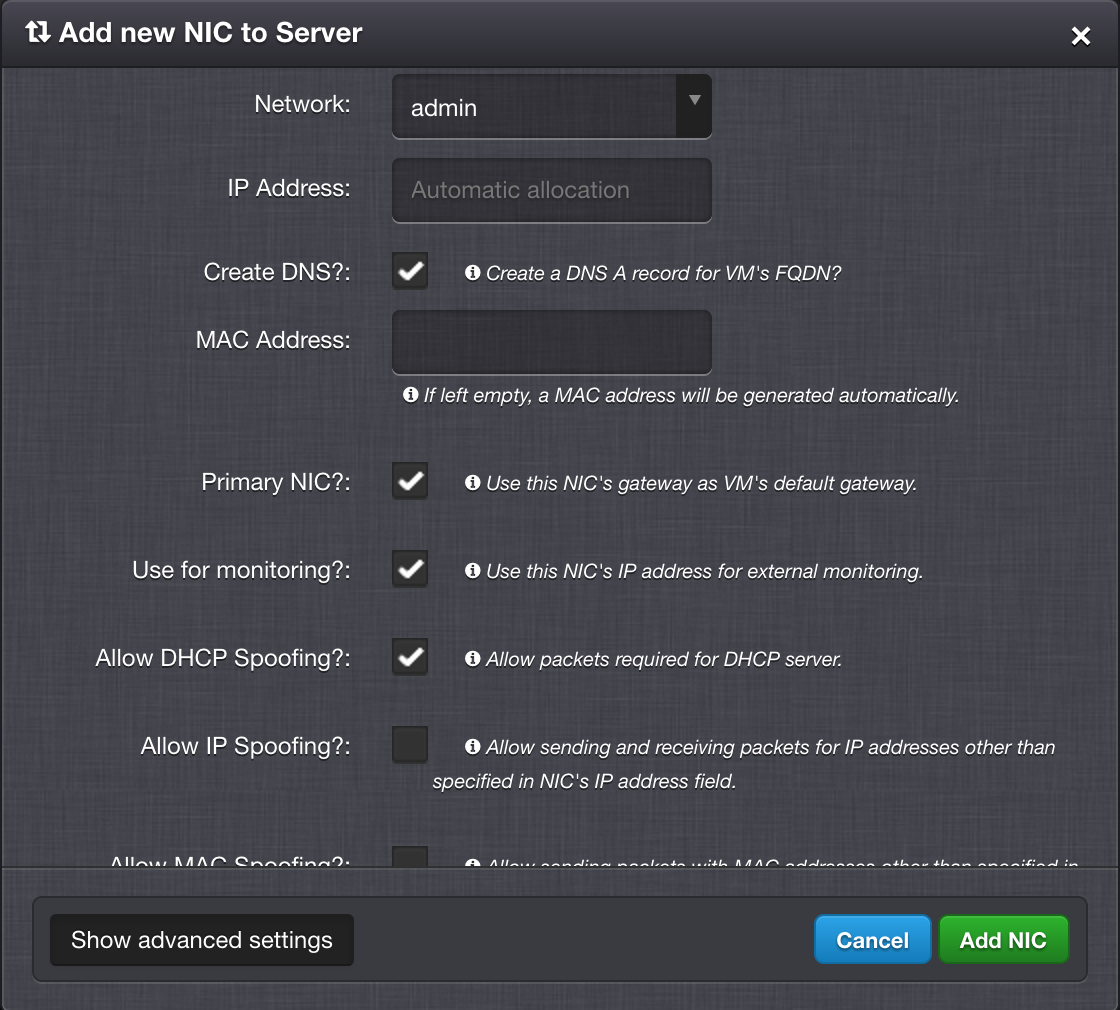
Add a NIC with the admin network and DHCP spoofing enabled.
Deploy your PXE zone.
Install and Configure Required Services
Install dnsmasq (for DHCP and TFTP) and nginx (for HTTP).
[root@pxe-boot ~] pkgin install dnsmasq nginx
Configure dnsmasq (DHCP and TFTP).
Download a semi-prepared
dnsmasq.conf:[root@pxe-boot ~] curl https://docs.danube.cloud/user-guide/_downloads/dnsmasq.conf > /opt/local/etc/dnsmasq.conf
Change at least the following configure options in
/opt/local/etc/dnsmasq.confaccording to your admin network:dhcp-range=dhcp-option=option:routerdhcp-option=option:dns-server
Create the TFTP root directory.
[root@pxe-boot ~] mkdir -p /data/tftpboot
Configure nginx (HTTP).
The defaults are fine, just change the document root for
location /to something else.[root@pxe-boot ~] vim /opt/local/etc/nginx/nginx.conf location / { root /data/tftpboot/install; index index.html index.htm; autoindex on; }
Create the document root directory.
[root@pxe-boot ~] mkdir /data/tftpboot/install
Enable both services.
[root@pxe-boot ~] svcadm enable dnsmasq
[root@pxe-boot ~] svcadm enable nginx
Preparing TFTP and iPXE Boot Files
The iPXE client, iPXE scripts and ErigonOS (SmartOS) platform archive files must be properly placed into the TFTP root directory and are required for:
- Booting a compute node from the network;
- Installing a new compute node from the network. Note: installation of new compute nodes also requires additional files and configuration, which is explained in the next section.
The following files iPXE files should be placed into the TFTP root directory:
- iPXE client:
undionly.kpxeorundionly.kkpxe(alternative iPXE client that does not unload the PXE base code) - iPXE scripts:
menu.ipxeor more simpler variantesdc-latest.ipxe
[root@pxe-boot ~] cd /data/tftpboot
[root@pxe-boot tftpboot] curl -o undionly.kpxe https://docs.danube.cloud/user-guide/_downloads/IPXE-100612_undionly.kpxe
[root@pxe-boot tftpboot] curl -O https://docs.danube.cloud/user-guide/_downloads/menu.ipxe
- iPXE client:
Download and unpack a Danube Cloud ErigonOS (SmartOS) platform archive.
[root@pxe-boot ~] mkdir /data/tftpboot/erigonos
[root@pxe-boot ~] cd /data/tftpboot/erigonos
[root@pxe-boot erigonos] curl -O https://download.erigones.org/esdc/factory/platform/platform-<version>.tgz
[root@pxe-boot erigonos] gtar -xzvf platform-<version>.tgz
[root@pxe-boot erigonos] mv platform-<version> <version>
[root@pxe-boot erigonos] cd <version>
[root@pxe-boot <version>] mkdir platform
[root@pxe-boot <version>] mv i86pc platform
- After this operation the kernel should be in
/data/tftpboot/erigonos/<version>/platform/i86pc/kernel/amd64/unix - and the boot archive should be in
/data/tftpboot/erigonos/<version>/platform/i86pc/amd64/boot_archive.
- After this operation the kernel should be in
Configure the iPXE script. The default is to use the
menu.ipxe, but you can also boot a compute node directly by using the exampleesdc-latest.ipxescript. In any case, theplatform-versionandinstall-hostvariables at the beginning of the .ipxe script should be adjusted to your reality:[root@pxe-boot tftpboot] vim menu.ipxe set platform-version <platform-version> set install-host <pxe-boot-host-IP-address>
Preparing HTTP Install Files
This section describes additional steps required for installation of new compute nodes from the network. A working PXE boot environment including an ErigonOS (SmartOS) platform archive available via TFTP are necessary requirements for any network installation of Danube Cloud - this is described in the previous section.
Note
When installing a new compute node, please make sure that you always install the latest stable version.
Download and unpack a Danube Cloud compute node USB image.
[root@pxe-boot ~] cd /data/tftpboot/install
[root@pxe-boot install] curl -O https://download.erigones.org/esdc/usb/stable/esdc-ce-cn-<version>.img.gz
[root@pxe-boot install] gzip -d esdc-ce-cn-<version>.img.gz
[root@pxe-boot install] ln -s esdc-ce-cn-<version>.img esdc-ce-cn-latest.img
Download a sample
install script.[root@pxe-boot install] curl -O https://docs.danube.cloud/user-guide/_downloads/netboot_install_script.sh
Change the USB image download URL in the
netboot_install_script.shto the desired Danube Cloud compute node image.[root@pxe-boot install] vim netboot_install_script.sh USB_URL="http://<pxe-boot-host-IP-address>/esdc-ce-cn-latest.img"
Upgrading Network-booted Compute Nodes
When upgrading an already installed compute node, which is booted via PXE, two steps should be performed:
- Update of the Danube Cloud software on both, the management server and all compute nodes.
- Update of the ErigonOS (SmartOS) platform archive and relevant iPXE script.
In addition to regular upgrades of compute nodes, do not forget to check and update the Danube Cloud USB image used for installation of new compute nodes mentioned in the HTTP install files section.